
Over the weekend I made it a goal to finish these first two. It took me a little longer; I finished them Monday evening. This is a little backwards, but I'm going to post these now so you can see a finished (or close to finished) product. Don't worry - in later posts I'll go step-by-step. They still need a few tweaks, but you get the general idea:

After being well into the texturing process, Amber and I decided to go larger with all of them (sheesh!) It was too late to add onto these, so we're going to make base stones for them to sit on. Here are the backs:
 I see a few problems that hopefully be resolved with subsequent pieces, and I can still mess with these a little bit. The first thing is the color: while there is some variation, it's not random enough. Once you start on this process, it's too easy to become formulaic. Put a blotch here, then there, and soon, you have an evenly spaced pattern. You need to break things up a little, and it takes some restraint.
 The other thing is the shaping. In trying to weather the styrofoam, you can go a bit overboard and make it too rounded or puffy. Some roundness good, but it must be broken up by hard angles. This one I think suffered from that problem:
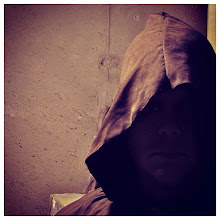
 The last major setback is the paint quality. I'm using acrylic, and it can become too plasticy. I'm going to try lightly spraying it with adhesive and then dumping dirt all over it to make it look dustier.
I'd welcome any feedback. Later.

From looking at the pictures, I can't see a pattern on the paint at all. I think it looks very natural. Are the last 2 pictures of the same piece?
ReplyDeleteThe pictures look pretty good, actually. If you see it in person, you can kind of pick out an evenness to it. Yeah, it looks like the last two are the same piece.
ReplyDelete